UPDATE, September 2017: Most of this information is now of historic/hacker value, as Let’s Encrypt has added Nginx support to the Certbot client, making the process MUCH simpler and quicker. However, it’s still worth reading through this how-to, as it could help you look out for places where things could go wrong.
A good friend recommended the free SSL certificate services offered by Let’s Encrypt. I thought I would give it a try and switch this site to HTTPS-only, and share the results of the process here.
First off, Let’s Encrypt is a “free, automated, and open certificate authority (CA), run for the public’s benefit.” Their certificates are provided by the Internet Security Research Group (ISRG). In short, it’s legit.
Let’s Encrypt’s goal is to make it as easy as possible to obtain and install a certificate. Compared to other SSL certificate providers, they’re on the right track when it comes to simplifying the process, but it’s not completely painless.
To get things started, you need to install the Let’s Encrypt client. This is a Linux-only client, given that this is a Linux Foundation Collaborative Project. If you’re using NGINX, it’s likely you’re operating in a Linux environment. If you’re not, this may not be the solution for you.
The client does two things: it verifies the ownership of the domain(s) for which you want a certificate, and it generates and installs the certificates on your web server for you.
I can attest that the Let’s Encrypt client definitely succeeds in simplifying domain the ownership verification process. (However, it falls kind of flat as of December 2015 in configuring NGINX to use the certificates as NGINX support is ‘experimental’. But read on for the solution.) To verify domain ownership, the client starts a web server that is used by Let’s Encrypt to verify the domain ownership. However, the client should be clearer up front that if you already have a running web server (which is very likely), you should temporarily stop your server first. You do get warned if the client detects that there’s already a process listening on port 80, but only when the client has already run through its process for some time. Fortunately, your site’s downtime in minimal, as it takes less than a minute to verify domain ownership.
Gotcha #1
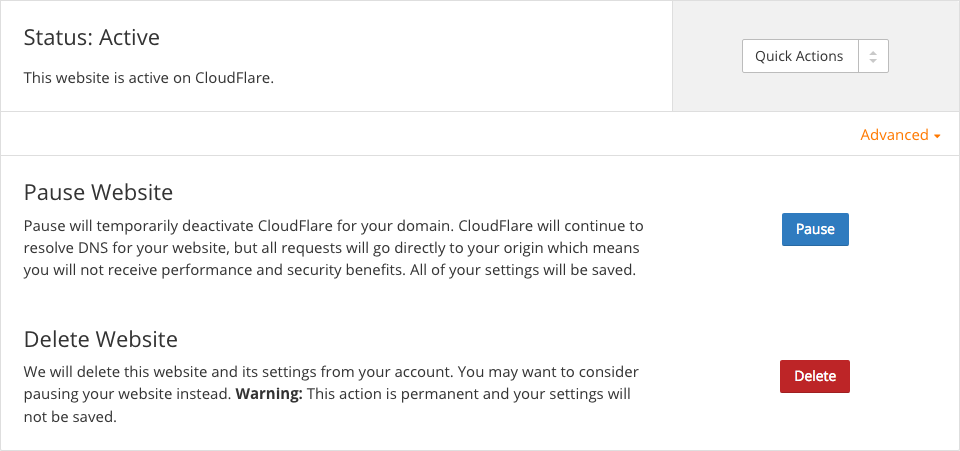
If you are using a service like Cloudflare, you will encounter another stumbling block: the domain verification will fail with the following error: urn:acme:error:tls :: The server experienced a TLS error during domain verification :: Failed to connect to host for DVSNI challenge. This message doesn’t really tell you where the problem is. To get around this, you have to pause Cloudflare on each domain for which you are requesting a certificate.
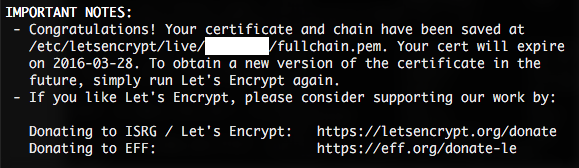
Once you have paused Cloudflare, and stopped your web server, the client should report a success, with a message like this: Congratulations! Your certificate and chain have been saved at /etc/letsencrypt/live/<DOMAINNAME>/fullchain.pem. Your cert will expire on <EXPIRYDATE>. To obtain a new version of the certificate in the future, simply run Let's Encrypt again. Seems simple enough, even though it’s a bit of a pain to have to do this four times a year.
Fortunately, the client has a pretty cool feature: if you’re running multiple domains, you can apply for certificates for multiple domains at the same time, like this:
./letsencrypt-auto certonly --standalone -d example.com -d www.example.com -d anotherexample.com -d www.anotherexample.com
At this stage, if you have succeeded in verifying ownership of your domain, your certificates will have been generated and saved in the directory specified in the success message. fullchain.pem is the public certificate, and it is a concatenation of your domain’s certificate (cert.pem) and the certificate chain (chain.pem). The directory will also contain your private key, saved in privkey.pem.
Gotcha #2
If your site is served by NGINX, you’ll need to manually configure SSL encryption by editing your site’s NGINX configuration file.
Gotcha #3
Let’s Encrypt’s certificates are valid for only three (3) months. That means that you need to renew your certificates every 90 days: To obtain a new version of the certificate in the future, simply run Let's Encrypt again.
Having to run the client once every three months isn’t too big a price to pay for a free certificate for each of your domains. But good news, you can automate the renewal.
The Ubuntu NGINX package looks for private certificates in /etc/ssl/private and public certificates in /etc/ssl/certs. Instead of creating copies of the Let’s Encrypt certificate files in these folders, I created symbolic links (symlinks) to the files:
ln -s /etc/letsencrypt/live/<DOMAINNAME>/privkey.pem /etc/ssl/private/<DOMAINNAME>.privkey.pem

ln -s /etc/letsencrypt/live/<DOMAINNAME>/fullchain.pem /etc/ssl/certs/<DOMAINNAME>.fullchain.pem
That way if ever the certificate files are updated (see Gotcha #3, above), all that is required for NGINX to recognize the updated files is a service nginx restart.
You can choose to serve your site over both non-encrypted (HTTP) and encrypted (HTTPS) channels, but this can present problems with content management systems like WordPress that include the protocol in the site name.
I chose to have NGINX redirect all non-encrypted requests (requests made on port 80) to the encrypted site (port 443). To do this, I added a new server block to the site’s NGINX configuration file:
server {
  listen 80;
  server_name <DOMAINNAME>;
  return 301 https://$server_name$request_uri;
}
Then, in the main server block, at the top, I removed the ‘listen 80;’ line, and inserted the following lines:
  listen 443 ssl;
  ssl_certificate /etc/ssl/certs/<DOMAINNAME>.fullchain.pem;
  ssl_certificate_key /etc/ssl/private/<DOMAINNAME>.privkey.pem;

  ssl_protocols TLSv1 TLSv1.1 TLSv1.2;
  ssl_ciphers HIGH:!aNULL:!MD5;
After saving the changes, and issuing a service nginx restart command NGINX should start serving pages over HTTPS.
Thank you for this excellent article It was very helpful and informative.